
Vacation Yacht boating and safety instructions
Boarding Location:
You should present yourself at your agreed upon boarding location by 9:30am on your first rental day. Boarding locations for Ottawa are Jacques Cartier Public Dock in Hull, or Dows Lake Pavilion on the Rideau Canal, or the RYC boat launch ramp at the Museum of Aviation, or at Mooney’s bay or Manotick Long Island Marina. For the Rideau Lakes the locations are Rideau Ferry Marina, Portland city Launch ramp at the Galley Restaurant or Newboro lock launch ramp. For the 1000 Islands Tall Ship public Launch ramp in Brockville, City of Gananoque public Marina or the Kingston Marina. Most locations have paid parking.
Safety:
If you have environmental allergies please seek advice before renting. At home you should revise the safety rules as per the boating safety manual that you obtained when you took your boating operator card exam. You will also be required to sign the safety awareness declaration when you board. At boarding the captain shall go through the boat safety equipment. Pointing the location of the life jackets, the life saver and throw rope, the fire extinguishers, the flares, the navigation lights, the nautical emergency power pack, the anchor and rode, the flash lights, the emergency sound horn, the medical kit and the spare electric and manual bilge pumps. Furthermore the Captain shall discuss with you the do’s and don’ts of boating, navigation and the man overboard maneuver.
Your location should always be known to the Captain. You shall contact the Captain every time you are heading for a destination and every time you arrive at the destination. It is imperative that you maintain contact in order for us not to initiate unnecessary emergency recovery operations.
Survey:
You shall inspect the bottom and all running gear while the boat is on the trailer. Any damages will be noted on your security deposit receipt. Inside the boat you will inspect all items listed on the boat inventory and sign the inventory sheet.
Fuel check:
Both the fuel gage reading and demonstrating that the tank will overflow by adding fuel from the jerry can will be shown. It is always advisable to fill up fuel whenever you are at a Marina since one never knows if the next stop will have fuel. For fueling safety, ensure that engine and all electrical appliances are turned off, turn on the blower and get yourself and everyone off the boat. Always have the jerry can 3/4 filled in case of emergency. The boat must be returned with a full tank of fuel as delivered.
Contracts:
The boat renter will sign the rental agreement. Everyone on the verssel will sign the insurance liability waiver.
Luggage:
Once survey and contract signing is complete, loading the boat with your trip supplies can be done. This can be done when the boat is on the trailer or after it is launched if the dock is not busy. Linens, clothes, food, snacks, drinks and ice, which may be procured at the launch location, should be loaded before you remove your car to the parking lot.
Launch:
The Captain with your assistance with either the tow vehicle or the boat lines, shall launch the boat within 1 hour of arrival if there are no encumbrances at the ramp.
Boarding the boat:
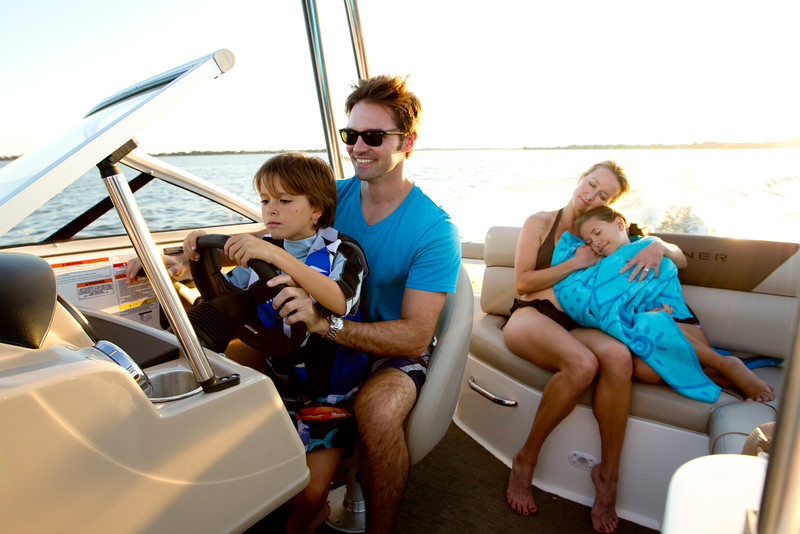
After the captain familiarizes you with the boat operating equipment; you, and your crew, will board the boat with the Captain to demonstrate your boat handling skill . Should your skill be judged insufficient you have the option to pay for a boating course ( price equal to a day rental, plus Captain, course supplement, service charge, the launch fee and fuel replenishment ) or cancel the trip and forfeit the transportation cost and a days rent. If your skill is judged adequate you will return the Captain back to the dock and pick the rest of your passengers and be on your way. The procedure from survey to departure can take up to 2 hrs.
Engine Startup:
1- Start blower for at least 3 minutes 2- Prime gas and wait a minute 3- Start engine . If the engine does not start it may be flooded. Wait 3 minutes till flooding evaporates and try again. You can prime with gas, try to start and wait till gas evaporates and retry but do not keep starting repeatedly. You will drain the battery. If you have an engine failure while underway. Stay calm. Let the boat drift to any depth around 20′, drop the anchor and call the captain.
Gears:
Do not force shifting ! grip the neutral button well. Shift slowly between forward and reverse otherwise Engine will sometimes stall. If it stalls, don’t panic. Put gear in neutral and restart engine. If ever you loose gear control or power steering. Don’t panic. Let the boat drift to any depth around 20′, drop the anchor and call your Captain for help.
Cruising:
The less weight the better performance. It is therefore recommended that luggage be kept to a minimum, water and fuel tanks be half full and the holding tank be emptied whenever possible. Cruise either at 1200rpm or plane at 3600 rpm or more. To plane, ensure you have no ropes or fenders in the water and ask passengers to momentarily step forward into the cockpit or the cabin. Start forward and aft bilge pumps. Put nose down by trim tabs and put out drive down by tilt buttons on the gear handle. Throttle to 3600 or more rpm and wait to plane. Once planed ask your guests to get comfortable. Ease off on the gas, adjust trim tabs to put nose up a little and tilt up the outdrive a little. Turn off bilge pumps. Occasionally turn them on if you feel the boat heavy.
Inverter:
If a 120v inverter with its own 12V Battery is installed in the engine room. The inverter should always left on. The inverter outlet plug is at the rear of the cockpit and will attach to the 120v boat outlet plug to supply 120V to the fridge, microwave, toaster and coffee maker and all 120V receptacles to work while underway or at anchor. Do not operate more than one appliance at a time. The Hot water heater, the Cook top range and the Battery charger operate only on shore power. An alarm will sound when the inverter depletes its battery. Running the engine for 15 minutes should recharge the batteries.
Emergency power pack:
The Nautilus portable power pack is constantly plugged to its charger in the cabin. The power pack gives a 12v battery that is used to power the Dinghy electric motor, power the electric dinghy air pump, boost the engine starting battery, provide a cigarette lighter power outlet, provide a USB power outlet to plug your cell phone at night. Furthermore it has a limited capacity 120v power outlet. The power pack also has a red and green navigation light. It can be used in case the boat navigation light is burnt out.
Electricity Setting
Panel
– Power line on
– Fridge on
– Receptacles on
Engine Room
– Battery Bank 2
– Inverter on if equipped
Wiring diagram is on the wall. Spare fuses are under the step access to the cabin. Fuse box is under the dashboard.
Electricity at dock:
– Connect extension power cable to dock
– disconnect inverter plug in boat if equipped
– Connect extension power cable to boat
– Battery Charger ON
– Optional Hot water on
– You can use all appliances at the same time
Electricity leaving dock:
– Disconnect extension power cord and take it with you
– Connect the Inverter plug to boat if equipped
– Water heater OFF
– Battery Charger OFF
– Do not use more than one 120v appliance at a time
Electricity At Anchor:
– All settings are as leaving dock
– Turn Anchor light on if evening
– If bank 2 is depleted switch to bank 1 to start engine
– If both batteries are depleted use nautilus pack to boost battery 1
Docking:
Going slow is the key to safe and easy docking. Always know where the wind and current will push you and adjust in and out of gear for short forward and reverse drives to align with the dock. ( see you tube videos on docking. It helps )
There are two bow and two stern lines on each side of the boat. The bow lines are long enough to tie the boat to the dock cleat then sling back to tie to the boat’s midship cleat. The stern lines are sufficient to tie the boat to the dock cleats. There are two lines attached to the boat railings at mid-ship. These lines are short and are there for use when going through the locks.
Through Locks:
There are two telescoping poles and two lock lines attached to the forward deck railings. Before entering the locks, The captain should have a set of a pole and line and the crew the other. The fenders height should be adjusted to protect the boat from rubbing against the lock wall. The Captain very slowly enters the Lock angled towards where the boat is to stop. Using reverse and neutral, the boat should be stopped as close as possible to the lock wall. This would allow the crew to grab the cable on the wall by hand or by the telescoping pole. Once the cable is grabbed, The boat lock line is passed around the cable and secured to the boat railing. The captain should then leave the helm and do the same thing as the crew to secure the boat stern to the Lock cable. The Captain should then turn off the engine and wait till the water level changes and the lock doors are open to leave. To leave, turn the engine on then release the stern lock line. Instruct the crew to release the forward lock line. Advance very slowly out of the lock. click here for more information on locks
Fresh Water:
The boat is supplied with a full fresh water tank. Whenever you are fueling or at a Marina always fill up the fresh water tank and add freshener to it. The fresh water tank has potable water that is fine for brushing teeth, boiling and showers. It is drinkable but it may be better to have bottled water. The freshwater tank fill access is on the starboard side where the captain sits. The water pressure pump activation switch on the left panel when facing the sink. Please turn off the pump when not in use, specially at bedtime. Hot water is only available when the boat is plugged to electric shore power. Caution do not fill water through the fuel tank.
Waste Water:
The toilet water holding tank will fill up within 2 days of usage. Whenever you are at a Marina or before returning the boat. The waste water holding tanks must be emptied.
Emergency Bilge Pump:
Connect pump to cigarette lighter or the nautical power pack if the boat battery is dead. Connect Hose from Engine room to bilge pump. Discharge bilge water to the floor drain at the starboard aft corner of the cockpit.
Head:
To flush turn knob to the left. Pump water in bowl. Turn knob to the right. Pump water to holding tank. Do not throw paper in the toilet. Leave it in the waste basket. If you need a number 2 try to use a marina facility when you can. Showers are also better at a marina. If you use the shower in the head turn on the forward bilge pump for a few minutes when finished and dry the head walls. Pump out the holding tank whenever you are at a Marina. If you are allergic to bowel odor control products please advise before renting.
Garbage:
There are kitchen catcher garbage bags at the boat. Save your plastic bags as well. There is a waste basket in the kitchen, in the toilet and a bucket in the cockpit to place the bags. Whenever you are at a Marina, or at any dock, check for garbage disposal bins and dispose of the boat garbage bags.
BBQ:
The BBQ comes with one propane canister which is likely to last for 4 meals. On an extended vacation you will need to bring your own canisters. To use the BBQ remove all back canvas in the proximity of the BBQ. Ensure you have a lighter flame on before opening the BQQ propane. Ensure that your emergency fuel jerry can is as far away from the BBQ as possible. The BBQ is permanently mounted at the transom rail. Cook while standing in the aft cockpit. It is recommended that you use aluminum foil to protect your food from burn. You may also cook vegetables and precooked rice by wrapping it in aluminum foil.
Camper stove:
A Coleman single burner camper propane stove with one propane canister is supplied. The canister should last for boiling or frying about 6 meals. On extended vacation you will need to bring your own canisters. The camper stove is kept in the storage hatch under the left seat of the cabin dining table. To use the camper stove TAKE IT OUT of the cabin. You can use it on the cockpit table. Ensure you have a lighter flame on before opening the camper stove propane. You can use the camper propane stove for boiling water or boiling food or frying.
Cabin cook top:
The cook top in the cabin can only be used when the boat is at the Marina and is attached to 120v shore power. No frying or cooking of any food generating odors are permitted in the cabin. You may use the cooktop only for boiling odorless food. The top of the cooktop is used as a counter to prepare all food.
Cooking:
There are many on board menus found on the internet. However due to limited freezing ability one relies on replenishing foods from the towns as one is going through the vacation. Experience has shown that all meats work well on the BBQ and can last up to two days on ice in the cooler. Canned vegetables can all be wrapped in an aluminum foil and warmed up while the meat is BBQ’ing. We also found that Uncle Bens Bistro expres pre-cooked flavored rice warmed up in aluminum foil is a treat. Boiling water for tea or coffee and frying eggs on the Coleman in the cockpit while toast is in the toaster in the cabin works well for breakfast. The microwave can also be used.
Sun tanning:
You can tan in the cockpit by opening the back portion of the Canvas top. Or you can tan on the boat deck using the sun deck foldable seats.
The sun is quite strong and there are mosquitoes, deer flies and bees on the rivers, the lakes and the canals in the summer. Bring insect repellent and sun tan lotion.
Canvas:
The top pieces of the canvas should not be removed from their frame at all. It is however possible to detach the zipper of the top behind the radar arch and swing the rear frame back to expose the rear cockpit to the sun. All the sides, front and rear transparent canvas can be removed, rolled and left in the cabin. It is recommended that all transparent canvas panels be put back on before dusk if one wants to avoid mosquitos.
Dinghy:
If you requested the Dinghy it will be mounted to the swim platform. The light electric motor will be inside it with the oars. The power pack in the cabin is used to power the electric motor as well as attach the electric pump in case the Dinghy needs to be inflated. Do not use the dinghy with just the oars in a current. You may not be able to row your way back to the boat. Best use the electric motor. Always put the power pack in the cabin plugged to its charger.
Fishing:
Two fishing rods are supplied overhead in the cockpit. There is a fish tackle box in the storage hatch in the cockpit. Best is to buy worms for fishing or bring your favourite tackle. If you will be bringing your own fishing rods we will remove the ones supplied.
Sleeping:
The aft cabin bed has a double foam 6” mattress with a 3” memory foam top layer. The mattress is enveloped by a 1” padded mattress cover. Freshly washed linens comprised of a folding and a flat bed sheet, two down pillows with pillow cases, a blanket and a comforter is supplied. You can bring your own linens and pillows and the suppled linen will be removed. The V berth has a double V foam mattress. You can either bring linen for it or a double sleeping bag. The Dining table in the cabin converts to a 4×5’ bed primarily for kids. Bring a single sleeping bag if you intend to use that sleeper.
Haul out:
Before you meet the Captain at the agreed upon haul out location at or before 6:00pm. You will pack all your personal belongings and ensure that the boat gas tank and jerry can are full of fuel and that the waste water tank has been pumped out. You will dock the boat at the haul out ramp. The Captain will back the trailer into the water and give you instructions to assist with the haul out. Once hauled out. Your car is brought close to the boat to unload your belongings. The captain will then examine the boat for damages and check its inventory and return your security deposit without any deduction if there are no damages. You can then be on your way while the Captain straps the boat for transport home. This procedure can take up to 1.5hrs.
Itineraries:
- Rideau Canal Vacation
- 1000 Island Vacation
- Ottawa River Vacation
These suggested itineraries may be sent by email upon an approved booking request.